
The Ultimate Guide to Building Your Own Guitar Kit with Basic Tools
Are you passionate about music and eager to embark on a creative journey? Building your own guitar from scratch can be a fulfilling and rewarding experience, even if you have no prior knowledge or expertise. With the right tools and a DIY guitar kit, you can assemble your dream instrument right at home. In this comprehensive guide, we will walk you through the entire process, from the assembly to explaining each component and the necessary tools. Whether you’re interested in a 12-string guitar kit, a 335 guitar kit, a 5-string bass kit, or any other type of guitar, we’ve got you covered.
Understanding Guitar Kit Options
Before diving into the assembly process, it’s essential to familiarize yourself with the different types of guitar kits available. Here are some popular options:
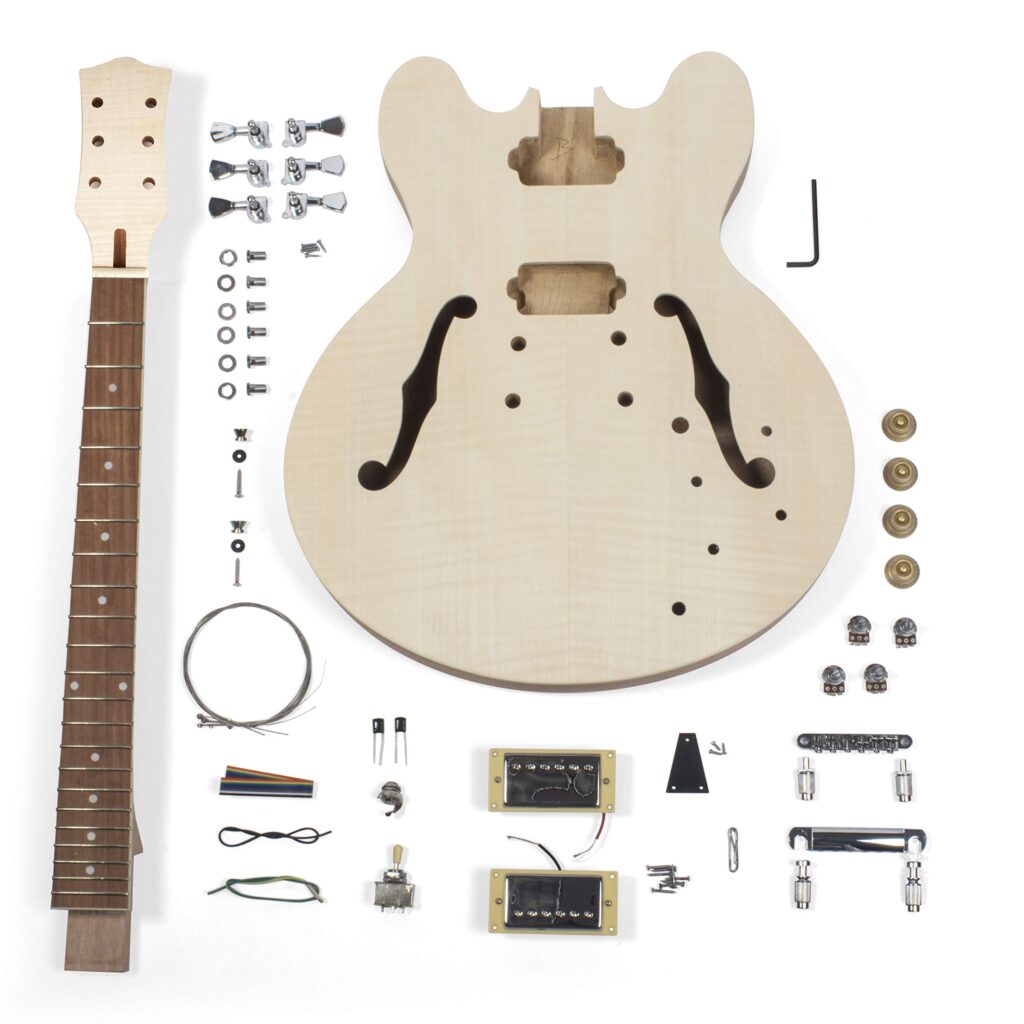
1. Semi-Hollow body Guitar Building Kits Acoustic guitar building kits provide all the components required to construct a beautiful acoustic instrument. These kits often include a solid wood top, back, and sides, along with the necessary hardware and instructions.
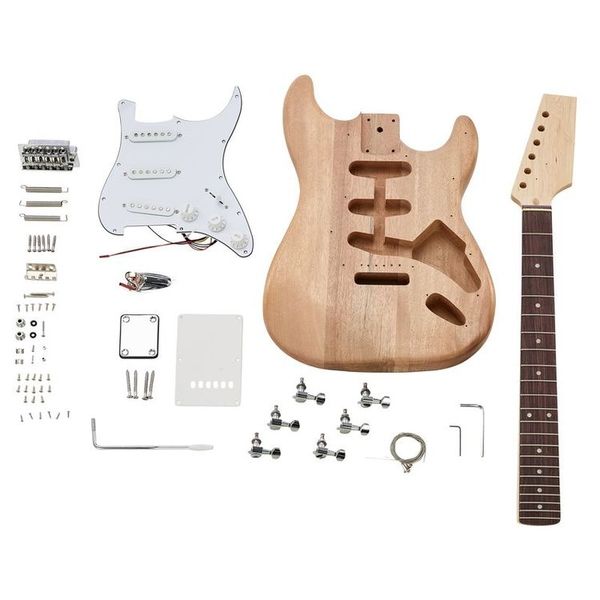
2. Electric Guitar Kits Electric guitar kits offer the opportunity to build your own custom electric guitar. These kits come with a solid body, pickups, electronics, and all the essential hardware to create your personalized instrument.

3. Bass Guitar Kits Bass guitar kits cater to those interested in building their own bass guitar. These kits contain the components necessary to assemble a solid, reliable bass instrument.
Essential Tools for Guitar Kit Assembly
To get started on your guitar building journey, you’ll need a few basic tools. Here’s a list of tools that will come in handy during the assembly process:
- Screwdrivers (Phillips and flathead): These will be used to tighten screws and adjust components.
- Wrenches: You’ll need wrenches to tighten nuts and bolts securely.
- Pliers: Pliers will help you manipulate wires and grip small components.
- Wire cutters: These are essential for trimming excess wire during the wiring process.
- Soldering iron: If your kit requires soldering for electrical connections, a soldering iron is a must-have tool.
- Sandpaper: Sandpaper of various grits will be used for smoothing and shaping the guitar body and neck.
- Files: Files are useful for shaping the nut, adjusting frets, and refining the contours of the instrument.
- Clamps: Clamps will help hold components in place while the glue dries.
Step-by-Step Assembly Process


Now that you have your kit and tools ready, let’s dive into the detailed, step-by-step assembly process for building your own guitar kit:
1. Organize Your Components Start by laying out all the components of your guitar kit. Take a moment to familiarize yourself with each part and ensure that you have all the necessary pieces. These typically include the body, neck, pickups, bridge, tuners, electronics, screws, and other hardware.
2. Prepare the Body and Neck Using sandpaper, smooth out any rough edges or imperfections on the body and neck. Pay attention to the contours and shapes, ensuring they match your desired design and comfort.
3. Attach the Neck to the Body Align the neck with the body, ensuring a proper fit. Depending on the kit, there may be pre-drilled holes or marks to guide you. Use screws or bolts to secure the neck to the body, taking care not to overtighten. This step forms a crucial foundation for the rest of the assembly.
4. Install the Hardware Begin installing the hardware components according to the kit’s instructions. This includes attaching the bridge, tuners, control knobs, and any other hardware provided. Use screwdrivers or wrenches to securely fasten each component, ensuring proper alignment and functionality.
5. Install the Pickups and Electronics Follow the wiring diagram provided with your kit to install the pickups and electronics. Start by soldering the wires to the appropriate terminals on the pickups, ensuring a solid connection. Carefully route the wires through the body cavities and connect them to the volume and tone controls, output jack, and any other required components.
6. Wire the Electronics If your kit requires wiring, follow the provided diagrams and instructions to connect the pickups, volume and tone controls, and output jack. If you’re new to soldering, refer to online tutorials or seek assistance from experienced hobbyists. Take your time and ensure clean solder joints for optimal signal flow.
7. Adjust the Truss Rod and Nut Locate the truss rod adjustment nut, usually accessible from the headstock. Use an appropriate hex key or wrench to make small adjustments to the neck’s curvature, ensuring it is straight or has a slight relief, depending on your preference. Additionally, check the nut slots for proper string height and spacing, filing them if necessary for comfortable playing.
8. Set the Bridge Height and Intonation Adjust the bridge height to achieve your desired string action. Lowering the bridge will lower the action, while raising it will raise the action. Strike a balance between comfortable playability and avoiding excessive string buzz. Once the action is set, fine-tune the intonation by adjusting the saddle position for each string. This ensures accurate pitch up and down the neck.
9. Install the Strings Thread the strings through the bridge and nut, following the appropriate path for your guitar’s design. Use a string winder to quickly and efficiently bring the strings up to tension. Stretch and settle the strings, retuning as necessary until they stabilize. Trim any excess string length and secure them to the tuning pegs.
10. Perform a Final Inspection Carefully examine your assembled guitar kit, checking for any loose screws, improper wiring, or other issues. Ensure all components are securely fastened, and the electronics function correctly. Make any necessary adjustments and perform a thorough test of all strings and pickups.
11. Finishing Touches After completing the main assembly, it’s time to add the finishing touches to your guitar kit:
- Fret Polishing: Use a fret polishing kit to clean and polish the frets, ensuring smooth playability.
- String Changing Kit: Install the strings of your choice on the guitar. A string changing kit will include tools such as string cutters, peg winders, and string action gauges to help you achieve proper string tension and height.
- Guitar Setup: Adjust the action (string height), intonation, and truss rod according to your preference. A guitar setup kit, which includes tools like hex keys and feeler gauges, will assist you in achieving optimal playability.
- Guitar Care Kit: Keep your guitar looking and sounding its best by using a guitar care kit. It typically contains cleaning solutions, polishing cloths, and fretboard conditioners to maintain the instrument’s appearance and performance.
Types of Guitar Kits
Now let’s explore various guitar models and their corresponding kits. These kits are classified into two categories: guitars and basses.
Guitars:
- 12 String Guitar Kit
- 335 Guitar Kit
- 7 String Guitar Kit
- 8 String Guitar Kit
- Archtop Guitar Kit
- DIY Acoustic Guitar Kit
- DIY Explorer Guitar Kit
- DIY Flying V Guitar Kit
- DIY Les Paul Guitar Kit
- DIY Telecaster Kit
- ES 335 Guitar Kit
- Explorer Guitar Kit
- Firebird Guitar Kit
- Flying V Guitar Kit
- Jaguar Guitar Kit
- Jazzmaster Kit
- Les Paul Guitar Kit
- Mustang Guitar Kit
- PRS DIY Guitar Kit
- Resonator Guitar Kit
- Strat Guitar Kit
- Telecaster Guitar Kit
- Warlock Guitar Kit
Basses:
- 4 String Bass Kit
- 5 String Bass Kit
- Jazz Bass Kit
- Precision Bass Kit
- Music Man Bass Kit
- Thunderbird Bass Kit
- Jaguar Bass Kit
- Stingray Bass Kit
- Rickenbacker Bass Kit
- P Bass Kit
- J Bass Kit
- PJ Bass Kit (Precision/Jazz Bass hybrid)
- Double Neck Bass Kit
- Short Scale Bass Kit
- Active Electronics Bass Kit
Conclusion
Building your own guitar kit can be an exciting and fulfilling experience, even for beginners. With the right tools, a suitable kit, and a step-by-step approach, you can assemble your dream instrument from scratch. From 12-string guitars to 5-string basses, the options are vast, catering to various musical preferences. So, roll up your sleeves, dive into the world of DIY guitar building, and create a personalized instrument that reflects your musical journey and style. Happy building!